Linked workspaces
A task that spans repositories, say a frontend and a backend, gets one linked workspace per repository.
All of them use the same workspace name and branch name.
Create linked workspaces
- On the New workspace page (⌘N), pick more than one repository in the repository picker.
- Or plan the change in a multi-repository Ask chat and press Start workspaces.
Create from… (branch, pull request or issue) works with one repository only.
Lanes from a plan
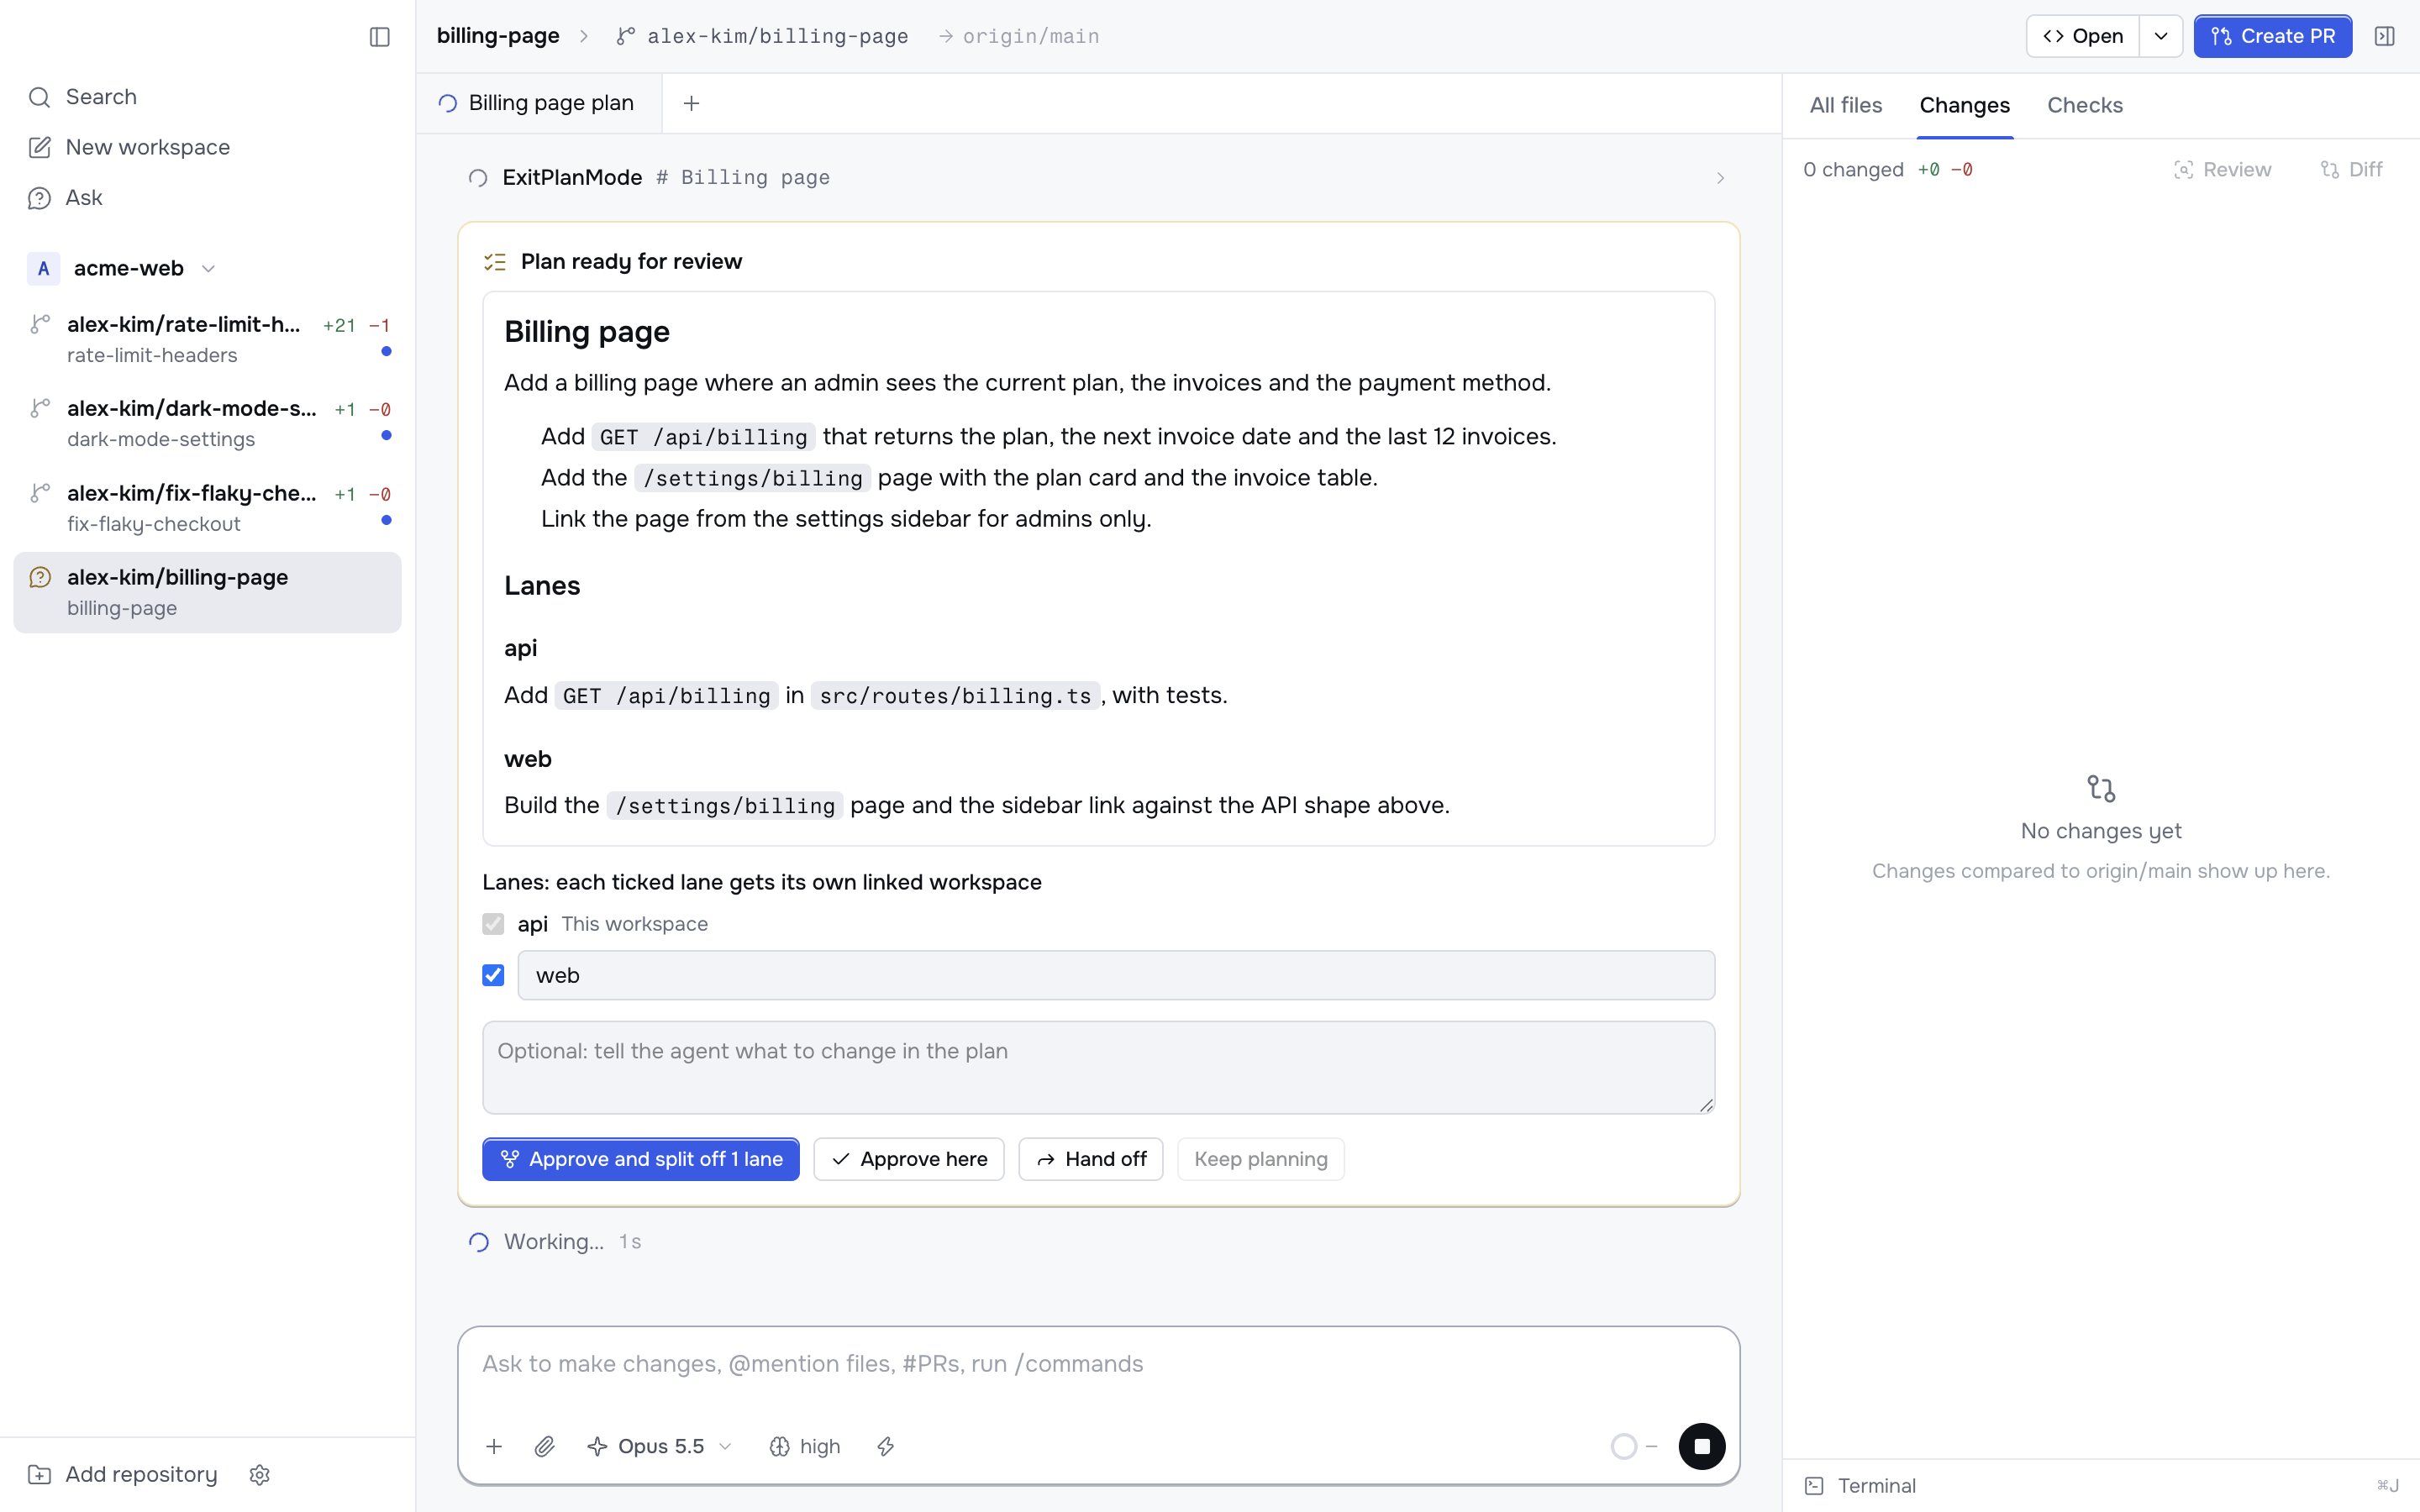
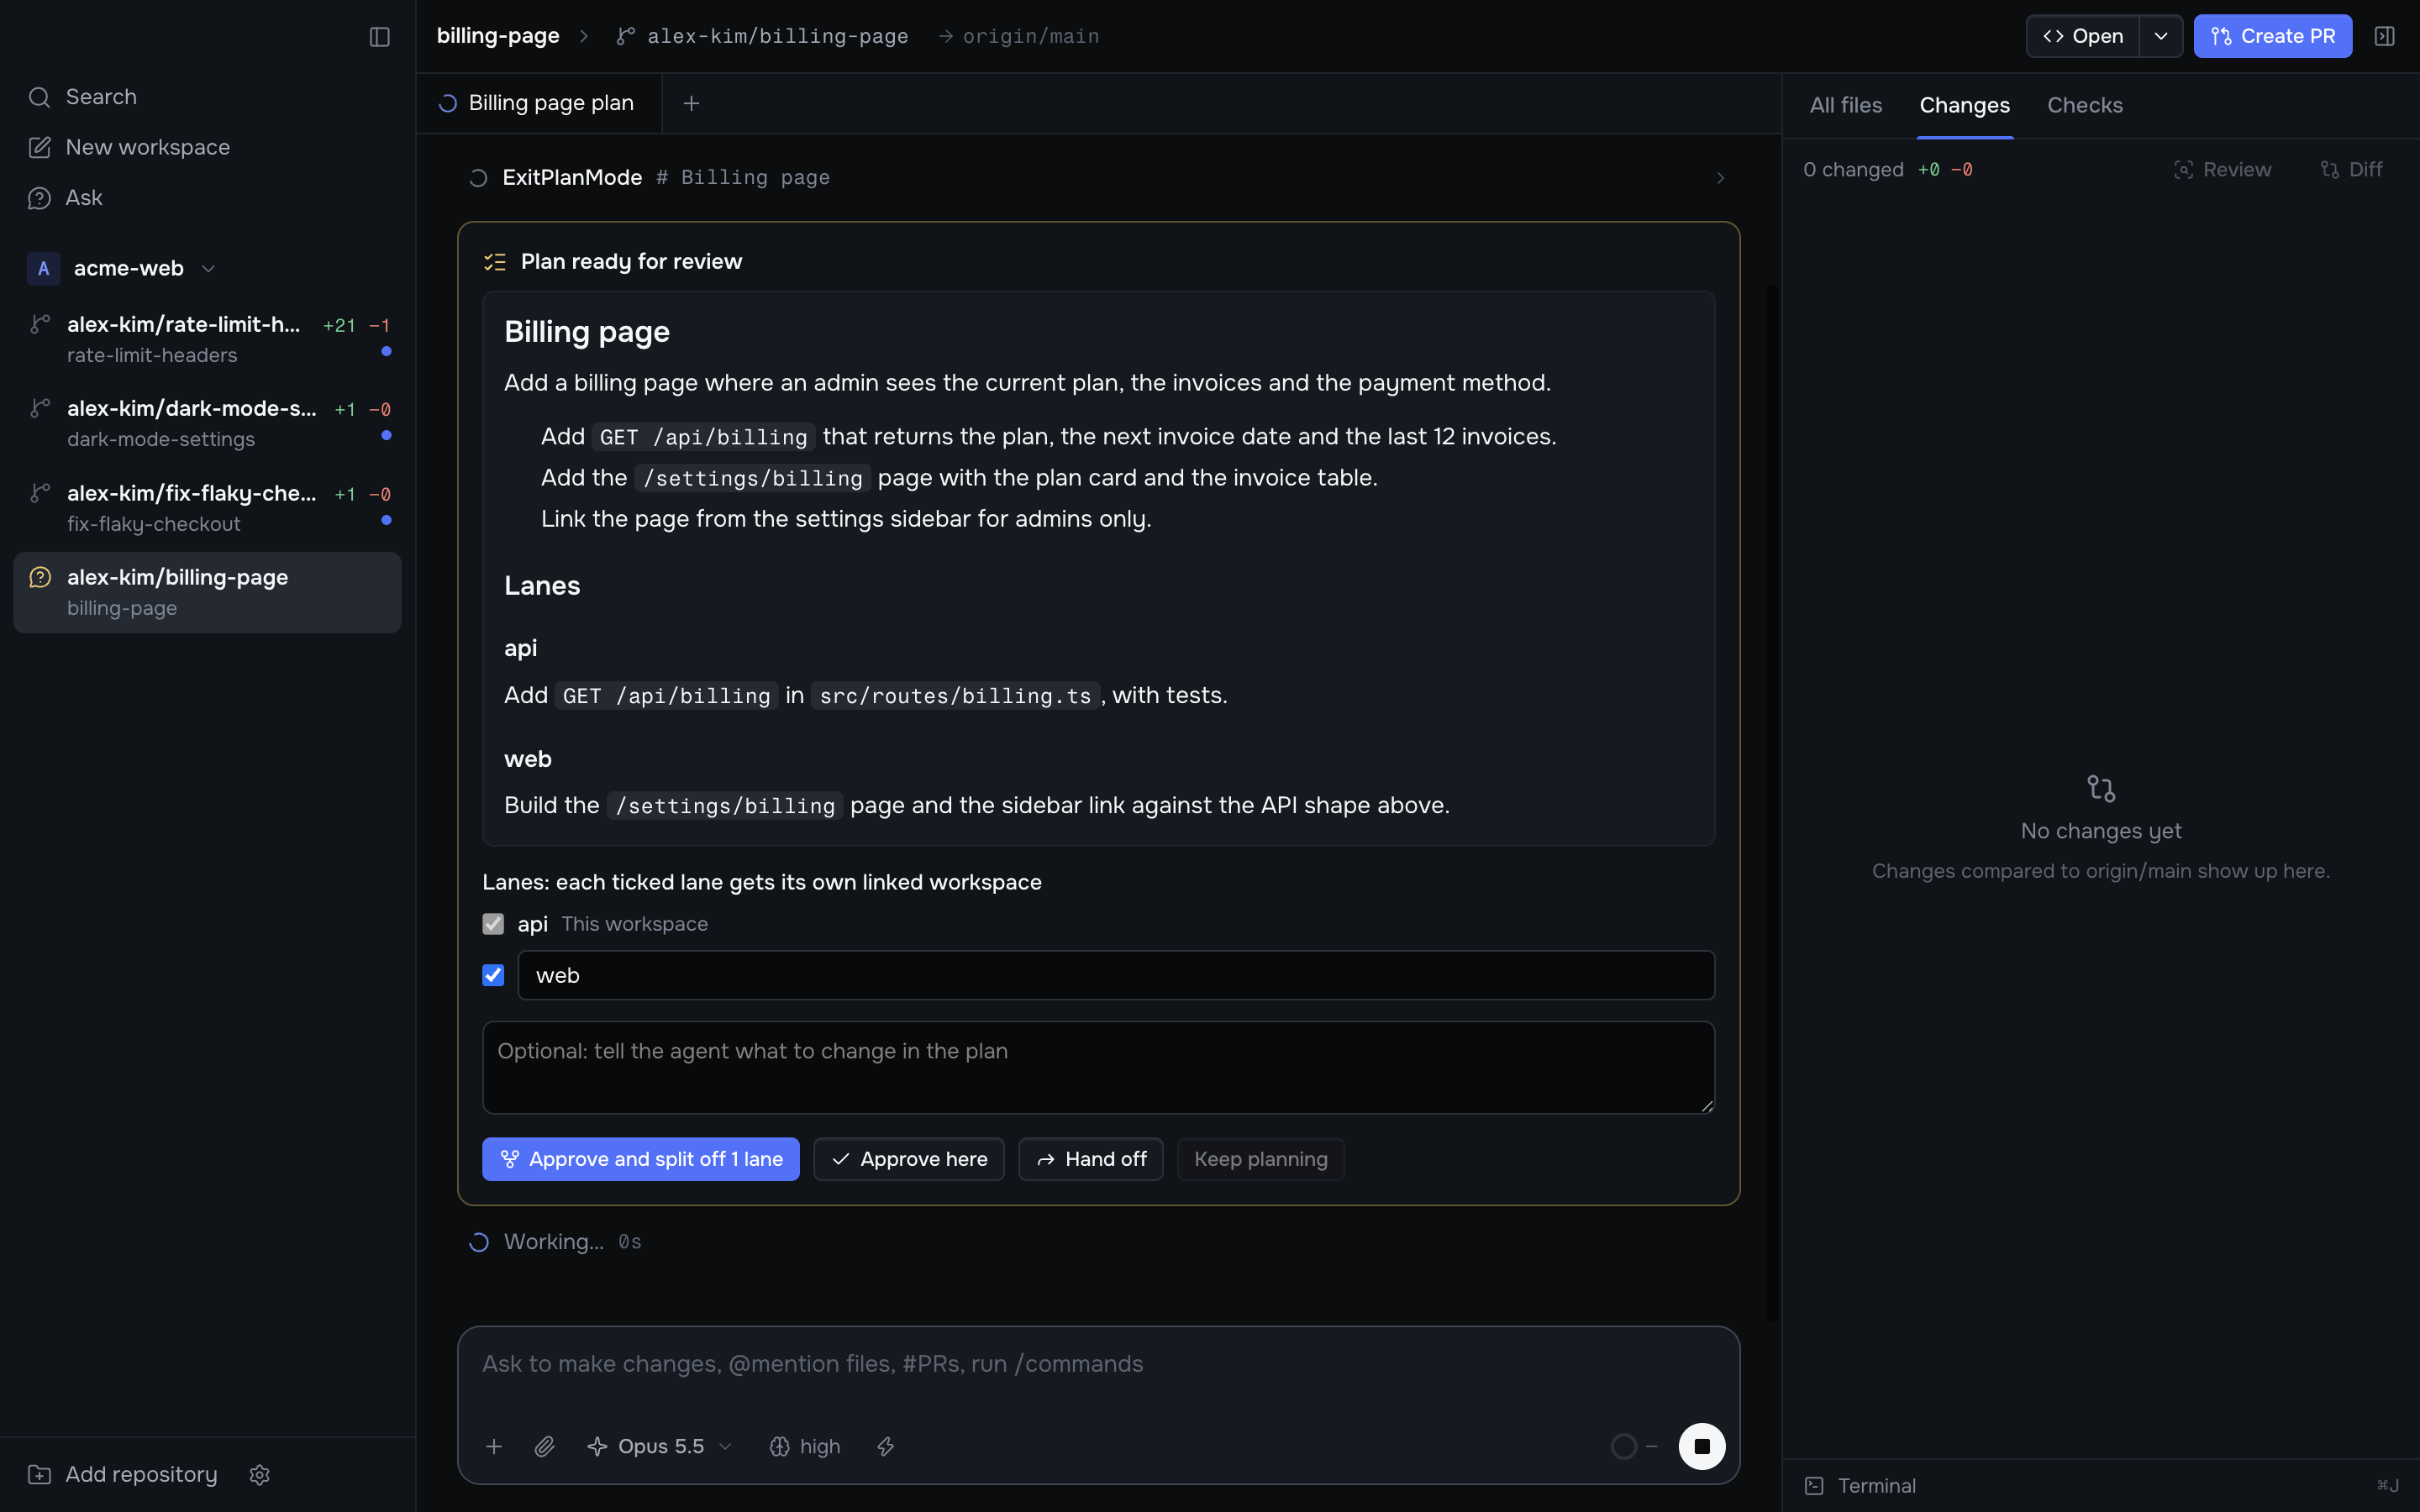
A plan can have parts that can be built at the same time. The agent, Claude Code or Codex, ends such a plan with a Lanes section. The plan card then lists the lanes:
- The first lane stays in this workspace.
- Every ticked lane gets its own linked workspace in the same repository, branched from the same target branch. You can rename a lane before you approve.
- An unticked lane stays in this workspace too.
Press Approve and split off N lanes. Each new workspace gets the planning conversation and the plan, and its agent builds only its lane. The agent in this workspace is told which lanes are built elsewhere. Approve here builds every lane in this workspace.
What each agent can do
- Each agent changes only its own repository.
- It can read the linked workspaces. Korev gives Claude Code access with
--add-dir. - It is told to leave notes for the other agents in their
.context/folders.
In the sidebar, linked workspaces sit next to each other and show a link icon. Hover it to see which workspaces are linked.